Samstag, 13. September 2014

Sturgeon-nosed canoe - Part 3 or crossing the finish line

After many hours of sawing, planing, gluing, bending, lashing, doweling, sewing and coating finally the boat is completed. After my little accident during the water test I decided to change the bow and stern design from a Sinixt- to a Kalispel-type. This post also includes pictures of my sons kayak, which he wanted to be painted in red. So watch the pictures and enjoy! 

The frame with its initial design...
 ...and after the switch to the new Kalispel-end design.

 A picture representing one term: satisfaction!

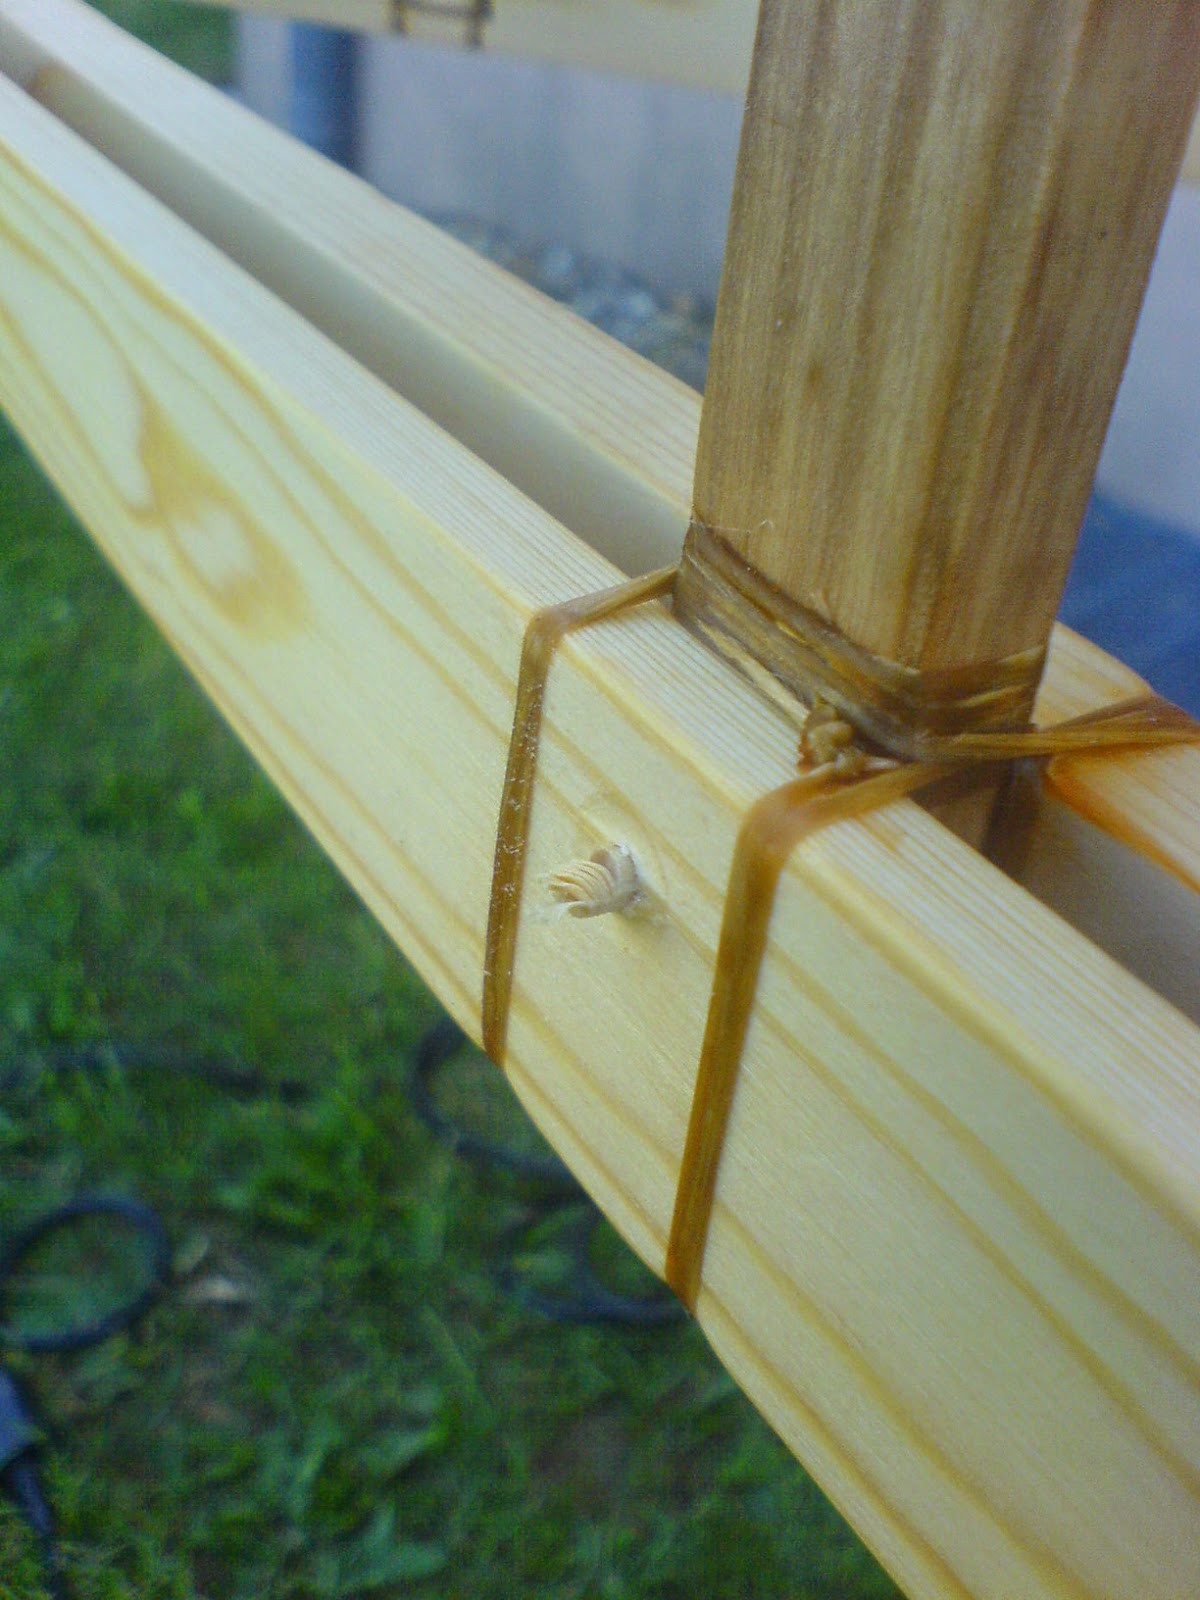
 A close up on the stern structure.

 Covering the boat starts with sewing a pocket at one end (bow or stern). Then this pocket is pulled of and another one is sewn at the opposite end. Now the skin is stretched until it rests in both pocket. Note to the copyist: don't do it alone.
 The skin is stretched over bow and stern.

 The skin is laced-up like a shoe!

 The first coat is on!

The middle one of the three layers of coating is pigmented to mimic the look of wet bark.
  
The finished boat!
  
A collocation of well proven classic transport design.
 

At first I was sceptic about the colour, but it turned out very well.
The paddle-armour is just pegged: no glue involved! 

 He didn't want to get out. First he went out on a long rope and then I had to tow him with the sturgeon nose.

 On that day I had wet eyes!

 Finally on the water!

 No comment!

 A good friend enjoying his first ride in a sturgeon-nosed canoe.

If you are interested in having a sturgeon nosed canoe please check out 

http://www.willhaben.at/iad/kaufen-und-verkaufen/sport-sportgeraete/stoernasen-solocanadier-paddel-ein-einzigartiges-boot-in-skin-on-frame-bauweise-95066631?adId=95066631


Montag, 21. Juli 2014

Sturgeon-nosed canoe - Part 2 or the first contact with water

This blog is about how you deal with firsts. 

First of all you can avoid mistakes by studying literature (like constructing a hull that is to round). Done that. 

Next thing you can do is to prepare for things that you anicipate to happen (like the breakage of the self-made coupling device half way down to the Alte Donau on the day of the first water trial; even my alltime favorite high-strength wood cornus mas/dogwood wasn't up for the job. A flexible rope coupling was the solution).  Done that.

And last but not least: try to prepare for things that you do not anticipate to happen....well, you will see about that further down.

With keelson, bow and stern elements attached it is now time to lash in the sheeting/stringers. 

It is the same thing with everything you do for the first time: it is very time consuming to lash in the sheeting.

After stepping back several times, watching and thinking, checking fotos again and again, here it is: the finished frame!

No comment, just a deep sense of satisfaction.

Yet another view of inner qualities. Note to the copyist: just do the minimum of lashing that is necessary to keep the stringers in the desired position, just in case you got the shape of the hull wrong!!!

Once again: no comment!

Ready for its first big test. The evening before D-Day in the living room (As I wrote in the last blog: dear copyist, do have an understanding wife;-).


D-Day: this harnessed team is going to turn heads!

Do you see the concrete pole top in the middle of the picture? It is af fixed table tennis table (what a nice noun). A perfect working platform for me down at the Dragonerhäufel at the Alte Donau. A root of a poplar broke my upper-stern 10 m away from that table. Thats what you get when you ride very low.

After a 7 kilometer ride including breakage of my coupling device, one might think that this got me upset. Nope!

Try to be prepared for the things you do not aticipate to be happening!

With tape, artificial sinew and a twig (from the very tree whose root broke my upper stern) the problem was degraded to a task and done in under 10 minutes).

Finally the boat is wraped and ready for the saran wrap test. This test tells you if you have built a hull with a reasonable stability in the water. If it goes well you can cover your frame with fabric and coat it. If not: you will have to rebend ribs and adjust the sheeting and test it again. The "if not"-option is definitely not the funny one!!!

So far so good: the craft floating unloaded!

 
 The craft floating loaded!! And its hull is of proper shape!!! Yeeaahhhhhh!!!!!!!!!!!!!!!!!!!

The Saran wrap test is giving you about 5 to 10 minutes of paddle time. The water really rises very fast.  I am deeply satisfied and a bit proud too...

I like to close this blog with many thanks to Nina, who assisted and took the pics. And one more thing for you to think about: the 5 P-Rule (Proper preparation prevents poor performance;-).

---

Soon to come: I came, I saw, I sewed!

Samstag, 12. Juli 2014

Sturgeon-nosed canoe - Part 1


Sturgeon-nosed canoe - Part 1


Sturgeon-nosed canoes were originally made with a hull out of bark. A possible description of the construction might be 'frame in bark'. When I first saw a skin on frame version of this intriguing shape I said to myself: I have to build this beauty. It looks like somehow built upside down if you compare it to "normal" open canoe. And thats for a reason: a long keelson makes a boat track well and determines the hull speed. And small above-waterline surface reduces drift caused by wind. 

If you want to learn more about the Sturgeon nosed/Kootenay canoe please check the following links:

http://indigenousboats.blogspot.co.at/2011/09/sturgeon-nose-canoes.html
http://en.wikipedia.org/wiki/Sturgeon-nosed_canoe
http://paddleandoar.com/notebook/snc/buildingSNC/index.html
http://www.traditionalkayaks.com/kutenai.html


The pine inwales and the thwart lashed and pegged together. On the left my sons 305 cm greenland-style kayak. On the right the matching paddle for the canoe to be built.

 I bent the ash-ribs in the bathroom (note to every copyist: do have an understanding wife;-). Now they are ready to be lashed to the inwales with artificial sinew.

 All ribs are in! Outwales and keelson ready to be attached.

To faciliate the process of tying in the sheeting, the ribs are pegged in place through the outwales in addition to the lashings. Note the stop on the drill assuring proper stud holes.

 Trimming is fun...

 ...when you have a chisel being as sharp as a razor. I have one.

Taking shape!

Detail of the dual-toned thwart made from ash.


Keelson attached, ...

... bow and stern pieces bent and lashed in ...

 
... and now it is pretty clear why it is called a sturgeon nosed canoe!
---

Soon to come: lashing in the sheeting and the first water test! 

Dienstag, 8. Juli 2014

A kayak for my son

What a craft weighing only 6 kg @ 305 cm lenght and 40 cm width: just lashed, pegged and sewn together with not a single piece of metal or a drop of glue! It is the most satisfying work i have ever done. Using my grandfathers tools and my knowledge about wood to manufacture a bespoke greenland-type skin on frame kayak for my son is truly a joyfull task. Many thanks to my web- and literature-mentors Thomas Grögler, David Zimmerly, Christopher Cunningham, Paul Montgomery and Harvey Golden!!!

 All ribs are in! Short sentence, long process...at least for the first time;-)

With the keelson and chines attached, bow and stern stem plates pegged in place (see the trapezoidal piece of darker wood connecting the stem with the gunwales) the only thing missing is the skin.


 First thing that really matters: inner qualities.

 Second thing that really matters: outer qualities.

Third thing that really matters: next project! 

---
Soon to come more pics of the next project: a sturgeon nosed canoe!